Mini Egg Swirled Cheesecake (Slimming World Friendly)

Mini Egg Swirled Cheesecake (Slimming World Friendly) This delicious cheesecake is perfect for fans of mini eggs and those following a Slimming World plan. It's surprisingly easy to make and requires minimal prep time. Craving a delightful cheesecake that's both delicious and fits your Slimming World plan? Look no further! This Mini Egg Swirled Cheesecake is a dream come true, offering a creamy texture, pops of chocolatey goodness, and all at a budget-friendly 6 Syns per slice. This recipe is surprisingly easy to make, requiring minimal prep time and letting the refrigerator do most of the work. In under 15 minutes, you'll have a show-stopping dessert ready to impress friends and family, without derailing your weight loss goals. About Time: Prep Time: takes 15 mins to make (plus 4 hours 15 mins chilling time) Yield: 10 slices Syns per serving: Approximately 6 Ingredients: Base: 10 whole-wheat digestive biscuits 50g low-fat spread Filling: 4 sheets gelatin leaves 600g fat-free natural Greek yogurt 150g extra-light plain soft cheese 1 tsp vanilla extract 2 tbsp sweetener granules 10g milk chocolate, finely chopped Topping: 10 Cadbury Mini Eggs, roughly chopped Instructions: Prepare the base: Line a 20cm springform pan with baking paper. Crush the digestive biscuits into fine crumbs using a food processor or by placing them in a sealed bag and bashing them with a rolling pin. Melt the low-fat spread in a saucepan and stir in the biscuit crumbs. Lightly grease the pan with cooking spray and press the crumb mixture into the bottom, forming an even layer. Chill in the freezer for 15 minutes or the fridge for 30 minutes. Bloom the gelatin: In a bowl, soak the gelatin leaves in cold water for 5 minutes until softened. Squeeze out any excess water and set aside. Make the filling: In a large mixing bowl, combine the Greek yogurt, soft cheese, vanilla extract, and sweetener granules. Using a whisk, beat until smooth. In a separate saucepan, heat 200g of the yogurt over low heat. Add the softened gelatin and stir continuously for 1-2 minutes, until completely dissolved. Let the gelatin mixture cool slightly. Assemble the cheesecake: Pour the cooled gelatin mixture into the yogurt mixture in the bowl and whisk well to combine. Gently fold in the chopped chocolate. Pour the filling over the chilled biscuit base and smooth the top. Refrigerate for at least 4 hours, or ideally overnight, to allow the cheesecake to set. Serve: Carefully remove the cheesecake from the pan and discard the baking paper. Scatter the chopped mini eggs over the top and cut into 10 equal slices for serving. Tips: For a richer chocolate flavor, use slightly more chopped chocolate in the filling. You can substitute the mini eggs for other chopped chocolates or chopped nuts for a different flavor variation. This cheesecake will keep well in the refrigerator for up to 3 days mynrecipes

Mini Egg Swirled Cheesecake (Slimming World Friendly)
This delicious cheesecake is perfect for fans of mini eggs and those following a Slimming World plan. It’s surprisingly easy to make and requires minimal prep time.

Craving a delightful cheesecake that’s both delicious and fits your Slimming World plan? Look no further! This Mini Egg Swirled Cheesecake is a dream come true, offering a creamy texture, pops of chocolatey goodness, and all at a budget-friendly 6 Syns per slice.

This recipe is surprisingly easy to make, requiring minimal prep time and letting the refrigerator do most of the work. In under 15 minutes, you’ll have a show-stopping dessert ready to impress friends and family, without derailing your weight loss goals.

About Time:

  • Prep Time: takes 15 mins to make (plus 4 hours 15 mins chilling time)
  • Yield: 10 slices
  • Syns per serving: Approximately 6

Go to the next page to get the Ingredients

Spicy Beef Kebabs with Yogurt Dressing

Spicy Beef Kebabs with Yogurt Dressing These Spicy Beef Kebabs with Yogurt Dressing. Tender ground beef is seasoned with aromatic spices and baked to perfection, then tucked into warm pita bread with crisp lettuce, juicy tomatoes, and a refreshing yogurt dressing. This recipe is: Light and satisfying: Made with lean ground beef and a yogurt dressing, it's perfect for a guilt-free meal. Flexible and customizable: Feel free to swap in ground chicken, turkey for a vegetarian option. Add your favorite toppings like feta cheese, fresh herbs, or pickled onions for an extra punch. Quick and easy: Whip up this recipe in under 30 minutes for a weeknight dinner that everyone will love. So ditch the takeout menu and embrace the flavor with these delicious and healthy homemade kebabs! About Time: Prep Time: 15 mins Cook Time: 2 hours plus 4 hours chilling Total Time: 2 hours 15 mins plus 4 hours chilling Yield: Serves 4 7 Syns per serving Ingredients: For the Kebabs: 1 tablespoon olive oil or low-calorie cooking spray 1 onion, finely chopped 3 garlic cloves, minced 500g lean ground beef (90% lean or higher) 1/2 teaspoon ground ginger 1 teaspoon ground cumin 1/4 teaspoon ground coriander 1/4 teaspoon ground cinnamon 1 teaspoon smoked paprika 1 egg, lightly beaten 1 tablespoon dried oregano or mixed herbs Salt and freshly ground black pepper to taste For the Yogurt Dressing: 1 small garlic clove, minced 200g plain Greek yogurt 1 tablespoon lemon juice 1/4 teaspoon dried mint Salt and freshly ground black pepper to taste For Serving: 4 whole-wheat pita breads, warmed Shredded lettuce (iceberg, romaine, or your favorite) Sliced red onion Sliced tomatoes Sliced cucumbers or gherkins (optional) Instructions: Heat oil/spray in a large pan over medium heat. Add onion and cook until softened and lightly browned, about 5-7 minutes. Add garlic and cook for another minute until fragrant. Remove pan from heat and let cool slightly. In a large bowl, combine cooled onion mixture, ground beef, ginger, cumin, coriander, cinnamon, paprika, egg, oregano, salt, and pepper. Mix well to combine. Shape the mixture into 4 equal-sized logs and place them on a baking sheet lined with parchment paper. Bake in a preheated oven at 180°C (350°F) for 20-25 minutes, or until cooked through. While the kebabs are baking, prepare the yogurt dressing. In a small bowl, whisk together minced garlic, yogurt, lemon juice, mint, salt, and pepper. Slice the cooked kebabs thinly and warm the pita breads. Assemble the kebabs by filling each pita with sliced kebab, lettuce, red onion, tomatoes, and optional cucumbers/gherkins. Drizzle with yogurt dressing and enjoy! Tips: Add a pinch of cayenne pepper to the kebab mixture for a touch of heat. Serve with additional toppings like crumbled feta cheese, chopped fresh herbs, or pickled onions. This recipe is easily doubled or tripled to feed a crowd. Please note: Nutritional information may vary depending on the specific ingredients used.

Spicy Beef Kebabs with Yogurt Dressing

These Spicy Beef Kebabs with Yogurt Dressing. Tender ground beef is seasoned with aromatic spices and baked to perfection, then tucked into warm pita bread with crisp lettuce, juicy tomatoes, and a refreshing yogurt dressing. This recipe is:

Light and satisfying: Made with lean ground beef and a yogurt dressing, it’s perfect for a guilt-free meal.
Flexible and customizable: Feel free to swap in ground chicken, turkey for a vegetarian option. Add your favorite toppings like feta cheese, fresh herbs, or pickled onions for an extra punch.
Quick and easy: Whip up this recipe in under 30 minutes for a weeknight dinner that everyone will love.
So ditch the takeout menu and embrace the flavor with these delicious and healthy homemade kebabs!

Spicy Beef Kebabs with Yogurt Dressing These Spicy Beef Kebabs with Yogurt Dressing. Tender ground beef is seasoned with aromatic spices and baked to perfection, then tucked into warm pita bread with crisp lettuce, juicy tomatoes, and a refreshing yogurt dressing. This recipe is: Light and satisfying: Made with lean ground beef and a yogurt dressing, it's perfect for a guilt-free meal. Flexible and customizable: Feel free to swap in ground chicken, turkey for a vegetarian option. Add your favorite toppings like feta cheese, fresh herbs, or pickled onions for an extra punch. Quick and easy: Whip up this recipe in under 30 minutes for a weeknight dinner that everyone will love. So ditch the takeout menu and embrace the flavor with these delicious and healthy homemade kebabs! About Time: Prep Time: 15 mins Cook Time: 2 hours plus 4 hours chilling Total Time: 2 hours 15 mins plus 4 hours chilling Yield: Serves 4 7 Syns per serving Ingredients: For the Kebabs: 1 tablespoon olive oil or low-calorie cooking spray 1 onion, finely chopped 3 garlic cloves, minced 500g lean ground beef (90% lean or higher) 1/2 teaspoon ground ginger 1 teaspoon ground cumin 1/4 teaspoon ground coriander 1/4 teaspoon ground cinnamon 1 teaspoon smoked paprika 1 egg, lightly beaten 1 tablespoon dried oregano or mixed herbs Salt and freshly ground black pepper to taste For the Yogurt Dressing: 1 small garlic clove, minced 200g plain Greek yogurt 1 tablespoon lemon juice 1/4 teaspoon dried mint Salt and freshly ground black pepper to taste For Serving: 4 whole-wheat pita breads, warmed Shredded lettuce (iceberg, romaine, or your favorite) Sliced red onion Sliced tomatoes Sliced cucumbers or gherkins (optional) Instructions: Heat oil/spray in a large pan over medium heat. Add onion and cook until softened and lightly browned, about 5-7 minutes. Add garlic and cook for another minute until fragrant. Remove pan from heat and let cool slightly. In a large bowl, combine cooled onion mixture, ground beef, ginger, cumin, coriander, cinnamon, paprika, egg, oregano, salt, and pepper. Mix well to combine. Shape the mixture into 4 equal-sized logs and place them on a baking sheet lined with parchment paper. Bake in a preheated oven at 180°C (350°F) for 20-25 minutes, or until cooked through. While the kebabs are baking, prepare the yogurt dressing. In a small bowl, whisk together minced garlic, yogurt, lemon juice, mint, salt, and pepper. Slice the cooked kebabs thinly and warm the pita breads. Assemble the kebabs by filling each pita with sliced kebab, lettuce, red onion, tomatoes, and optional cucumbers/gherkins. Drizzle with yogurt dressing and enjoy! Tips: Add a pinch of cayenne pepper to the kebab mixture for a touch of heat. Serve with additional toppings like crumbled feta cheese, chopped fresh herbs, or pickled onions. This recipe is easily doubled or tripled to feed a crowd. Please note: Nutritional information may vary depending on the specific ingredients used.

About Time:

  • Prep Time: 15 mins
  • Cook Time: 2 hours plus 4 hours chilling
  • Total Time: 2 hours 15 mins plus 4 hours chilling
  • Yield: Serves 4
  • 7 Syns per serving

Go to the next page to get the Ingredients

Slimming-Friendly Yorkshire Puddings

Slimming-Friendly Yorkshire Puddings Craving fluffy, golden Yorkshire puddings without blowing your budget? Look no further! These light and delicious puddings pack a satisfying punch with only 2 Syns per serving, making them the perfect way to add a touch of magic to your roast dinner Here's what makes this recipe special: Simple ingredients: Uses readily available, budget-friendly staples. Quick and easy: Takes just 5 minutes to prep and bakes in 25 minutes. Whole wheat option: Adds extra fiber and protein for a more filling experience. Low-calorie cooking spray: Keeps the Syns low without sacrificing flavor. About Time: Prep Time: 15 mins Cook Time: 25 mins (plus 30 minutes resting) Total Time: 40 mins (plus 30 minutes resting) Yields: 6 puddings Syns per serving: 2 Syns Ingredients: 60g whole wheat flour (or a blend of all-purpose and whole wheat) 75ml unsweetened almond milk (or other low-fat milk of your choice) 3 large eggs Pinch of salt Low-calorie cooking spray Instructions: Combine dry ingredients: In a jug or mixing bowl, whisk together the whole wheat flour and salt. Whisk in liquids: Gradually add the almond milk and eggs to the flour mixture, whisking continuously until smooth and lump-free. Aim for a batter with a smooth, pourable consistency. Rest the batter: Cover the jug or bowl with plastic wrap and refrigerate for at least 30 minutes. This allows the gluten to relax, resulting in lighter and fluffier puddings. Preheat the oven and prepare the pan: While the batter rests, preheat your oven to 220°C (200°C fan, gas mark 7). Generously spray a 6-hole muffin tin with low-calorie cooking spray and preheat it in the oven for about 5 minutes. This ensures the tin is hot enough for optimal rise and browning. Bake the puddings: Carefully remove the hot tin from the oven and divide the batter evenly between the 6 wells. Bake for 20 minutes without opening the oven door, as this can cause the puddings to deflate. Serve and enjoy: After 20 minutes, check if the puddings are golden brown and cooked through. If needed, bake for a few more minutes. Serve immediately with your favorite Slimming World-friendly roast dinner or other dishes. Tips: For extra protein and fiber, use a blend of whole wheat and all-purpose flour. If you prefer a richer flavor, use a small amount of low-fat butter or oil in the batter (add to the liquids with the eggs). This will increase the Syn value slightly. Be sure to use a non-stick muffin tin and generously spray it to prevent sticking. Don't open the oven door while the puddings are baking, as this can cause them to collapse. Serve the puddings immediately while they are still hot and puffed up. Additional notes: The Syn value of this recipe is an estimate and may vary depending on the specific ingredients you use and the portion size. This recipe is based on Slimming World principles, but it is always best to consult with your Slimming World consultant or plan for personalized guidance.

Slimming-Friendly Yorkshire Puddings
Craving fluffy, golden Yorkshire puddings without blowing your budget? Look no further!
These light and delicious puddings pack a satisfying punch with only 2 Syns per serving, making them the perfect way to add a touch of magic to your roast dinner

Here’s what makes this recipe special:

Simple ingredients: Uses readily available, budget-friendly staples.
Quick and easy: Takes just 5 minutes to prep and bakes in 25 minutes.
Whole wheat option: Adds extra fiber and protein for a more filling experience.
Low-calorie cooking spray: Keeps the Syns low without sacrificing flavor.

Slimming-Friendly Yorkshire Puddings
Craving fluffy, golden Yorkshire puddings without blowing your budget? Look no further!
These light and delicious puddings pack a satisfying punch with only 2 Syns per serving, making them the perfect way to add a touch of magic to your roast dinner

Here's what makes this recipe special:

Simple ingredients: Uses readily available, budget-friendly staples.
Quick and easy: Takes just 5 minutes to prep and bakes in 25 minutes.
Whole wheat option: Adds extra fiber and protein for a more filling experience.
Low-calorie cooking spray: Keeps the Syns low without sacrificing flavor.

About Time:
Prep Time: 15 mins
Cook Time: 25 mins (plus 30 minutes resting)
Total Time: 40 mins (plus 30 minutes resting)
Yields: 6 puddings
Syns per serving: 2 Syns
Ingredients:
60g whole wheat flour (or a blend of all-purpose and whole wheat)

75ml unsweetened almond milk (or other low-fat milk of your choice)

3 large eggs

Pinch of salt

Low-calorie cooking spray
Instructions:
Combine dry ingredients: In a jug or mixing bowl, whisk together the whole wheat flour and salt.

Whisk in liquids: Gradually add the almond milk and eggs to the flour mixture, whisking continuously until smooth and lump-free. Aim for a batter with a smooth, pourable consistency.

Rest the batter: Cover the jug or bowl with plastic wrap and refrigerate for at least 30 minutes. This allows the gluten to relax, resulting in lighter and fluffier puddings.

Preheat the oven and prepare the pan: While the batter rests, preheat your oven to 220°C (200°C fan, gas mark 7). Generously spray a 6-hole muffin tin with low-calorie cooking spray and preheat it in the oven for about 5 minutes. This ensures the tin is hot enough for optimal rise and browning.

Bake the puddings: Carefully remove the hot tin from the oven and divide the batter evenly between the 6 wells. Bake for 20 minutes without opening the oven door, as this can cause the puddings to deflate.

Serve and enjoy: After 20 minutes, check if the puddings are golden brown and cooked through. If needed, bake for a few more minutes.
Serve immediately with your favorite Slimming World-friendly roast dinner or other dishes.
Tips:
For extra protein and fiber, use a blend of whole wheat and all-purpose flour.

If you prefer a richer flavor, use a small amount of low-fat butter or oil in the batter (add to the liquids with the eggs). This will increase the Syn value slightly.

Be sure to use a non-stick muffin tin and generously spray it to prevent sticking.

Don't open the oven door while the puddings are baking, as this can cause them to collapse.

Serve the puddings immediately while they are still hot and puffed up.
Additional notes:
The Syn value of this recipe is an estimate and may vary depending on the specific ingredients you use and the portion size.

This recipe is based on Slimming World principles, but it is always best to consult with your Slimming World consultant or plan for personalized guidance.

About Time:

  • Prep Time: 15 mins
  • Cook Time: 25 mins (plus 30 minutes resting)
  • Total Time: 40 mins (plus 30 minutes resting)
  • Yields: 6 puddings
  • Syns per serving: 2 Syns

Go to the next page to get the Ingredients

Creamy Carbonara Recipe

Creamy Carbonara Recipe Creamy Carbonara with a Lighter Twist  This recipe offers a delicious and satisfying spin on the classic carbonara, perfect for those following the Slimming plan. By using lean bacon, fat-free fromage frais, and a controlled amount of Parmesan, you can enjoy this creamy pasta dish without derailing your weight-loss goals. Craving creamy carbonara but watching your weight? This recipe reimagines the classic carbonara with a Slimming -friendly spin, using lean bacon, fat-free fromage frais, and controlled portions of Parmesan cheese. Enjoy all the rich, satisfying flavors of the original without compromising your weight-loss goals. Perfect for a quick and delicious weeknight meal, this recipe is sure to become a new favorite. Here's what makes this recipe special: Slimming friendly: Uses lean protein, fat-free cheese Quick and easy: Ready in under 30 minutes, perfect for busy weeknights. Creamy and flavorful: Packed with all the delicious taste of the classic carbonara. Versatile: Easily customize with other protein options or add your favorite vegetables. So ditch the calorie-laden takeout and whip up this healthier version of carbonara at home. About Time: Prep Time: 15 mins Cook Time: 20 mins Total Time: 35 mins Yield: Serves 4 ½ Syn per serving Ingredients: 400g dried spaghetti 6 lean bacon rashers, thinly sliced (visible fat removed) 4 large eggs 4 tablespoons fat-free natural fromage frais 2 tablespoons grated Parmesan cheese (plus extra for garnish) Small handful fresh chives, finely chopped Instructions: Cook the spaghetti: Follow the package instructions to cook the spaghetti al dente. Drain well and reserve a small amount of the cooking water. Crisp the bacon: Heat a large non-stick frying pan over medium heat. Fry the bacon rashers until crisp and golden brown, about 2-3 minutes. Remove from the pan and set aside. Prepare the sauce: In a bowl, whisk together the eggs and season with salt and pepper to taste. Stir in the fromage frais, 1 tablespoon of Parmesan cheese, and most of the chopped chives. Combine the flavors: Add the cooked spaghetti back to the pan with the reserved cooking water. Toss over low heat to warm through. 7 Remove from the heat and immediately pour in the egg mixture, tossing continuously until the sauce thickens and coats the pasta. Do not overcook, as the eggs can scramble. Serve and enjoy: Divide the spaghetti between serving bowls. Top with the remaining Parmesan cheese, crispy bacon pieces, and a sprinkle of fresh chives. Tips: For an extra flavorful kick, add a pinch of black pepper or a squeeze of fresh lemon juice to the sauce. Feel free to substitute the bacon with other lean protein options like grilled chicken breast, shrimp, or smoked salmon. If you don't have fromage frais, you can use low-fat ricotta cheese or Greek yogurt instead. This recipe is easily doubled or tripled to feed a crowd. Store any leftovers in an airtight container in the refrigerator for up to 2 days.

Creamy Carbonara Recipe

Creamy Carbonara with a Lighter Twist
This recipe offers a delicious and satisfying spin on the classic carbonara, perfect for those following the Slimming plan. By using lean bacon, fat-free fromage frais, and a controlled amount of Parmesan, you can enjoy this creamy pasta dish without derailing your weight-loss goals.

Craving creamy carbonara but watching your weight?

This recipe reimagines the classic carbonara with a Slimming -friendly spin, using lean bacon, fat-free fromage frais, and controlled portions of Parmesan cheese. Enjoy all the rich, satisfying flavors of the original without compromising your weight-loss goals. Perfect for a quick and delicious weeknight meal, this recipe is sure to become a new favorite.

Here’s what makes this recipe special:

  1. Slimming friendly: Uses lean protein, fat-free cheese
  2. Quick and easy: Ready in under 30 minutes, perfect for busy weeknights.
  3. Creamy and flavorful: Packed with all the delicious taste of the classic carbonara.
  4. Versatile: Easily customize with other protein options or add your favorite vegetables.
    So ditch the calorie-laden takeout and whip up this healthier version of carbonara at home.

Creamy Carbonara Recipe
Creamy Carbonara with a Lighter Twist 
This recipe offers a delicious and satisfying spin on the classic carbonara, perfect for those following the Slimming plan. By using lean bacon, fat-free fromage frais, and a controlled amount of Parmesan, you can enjoy this creamy pasta dish without derailing your weight-loss goals.

Craving creamy carbonara but watching your weight?

This recipe reimagines the classic carbonara with a Slimming -friendly spin, using lean bacon, fat-free fromage frais, and controlled portions of Parmesan cheese. Enjoy all the rich, satisfying flavors of the original without compromising your weight-loss goals. Perfect for a quick and delicious weeknight meal, this recipe is sure to become a new favorite.

Here's what makes this recipe special:
Slimming friendly: Uses lean protein, fat-free cheese

Quick and easy: Ready in under 30 minutes, perfect for busy weeknights.

Creamy and flavorful: Packed with all the delicious taste of the classic carbonara.

Versatile: Easily customize with other protein options or add your favorite vegetables.
So ditch the calorie-laden takeout and whip up this healthier version of carbonara at home.
About Time:
Prep Time: 15 mins
Cook Time: 20 mins
Total Time: 35 mins
Yield: Serves 4
½ Syn per serving
Ingredients:
400g dried spaghetti

6 lean bacon rashers, thinly sliced (visible fat removed)

4 large eggs

4 tablespoons fat-free natural fromage frais

2 tablespoons grated Parmesan cheese (plus extra for garnish)

Small handful fresh chives, finely chopped

Instructions:
Cook the spaghetti: Follow the package instructions to cook the spaghetti al dente. Drain well and reserve a small amount of the cooking water.

Crisp the bacon: Heat a large non-stick frying pan over medium heat. Fry the bacon rashers until crisp and golden brown, about 2-3 minutes. Remove from the pan and set aside.

Prepare the sauce: In a bowl, whisk together the eggs and season with salt and pepper to taste. Stir in the fromage frais, 1 tablespoon of Parmesan cheese, and most of the chopped chives.

Combine the flavors: Add the cooked spaghetti back to the pan with the reserved cooking water. Toss over low heat to warm through.
7 Remove from the heat and immediately pour in the egg mixture, tossing continuously until the sauce thickens and coats the pasta. Do not overcook, as the eggs can scramble.

Serve and enjoy: Divide the spaghetti between serving bowls. Top with the remaining Parmesan cheese, crispy bacon pieces, and a sprinkle of fresh chives.
Tips:
For an extra flavorful kick, add a pinch of black pepper or a squeeze of fresh lemon juice to the sauce.

Feel free to substitute the bacon with other lean protein options like grilled chicken breast, shrimp, or smoked salmon.

If you don't have fromage frais, you can use low-fat ricotta cheese or Greek yogurt instead.

This recipe is easily doubled or tripled to feed a crowd.

Store any leftovers in an airtight container in the refrigerator for up to 2 days.

About Time:

  • Prep Time: 15 mins
  • Cook Time: 20 mins
  • Total Time: 35 mins
  • Yield: Serves 4
  • ½ Syn per serving


Go to the next page to get the Ingredients

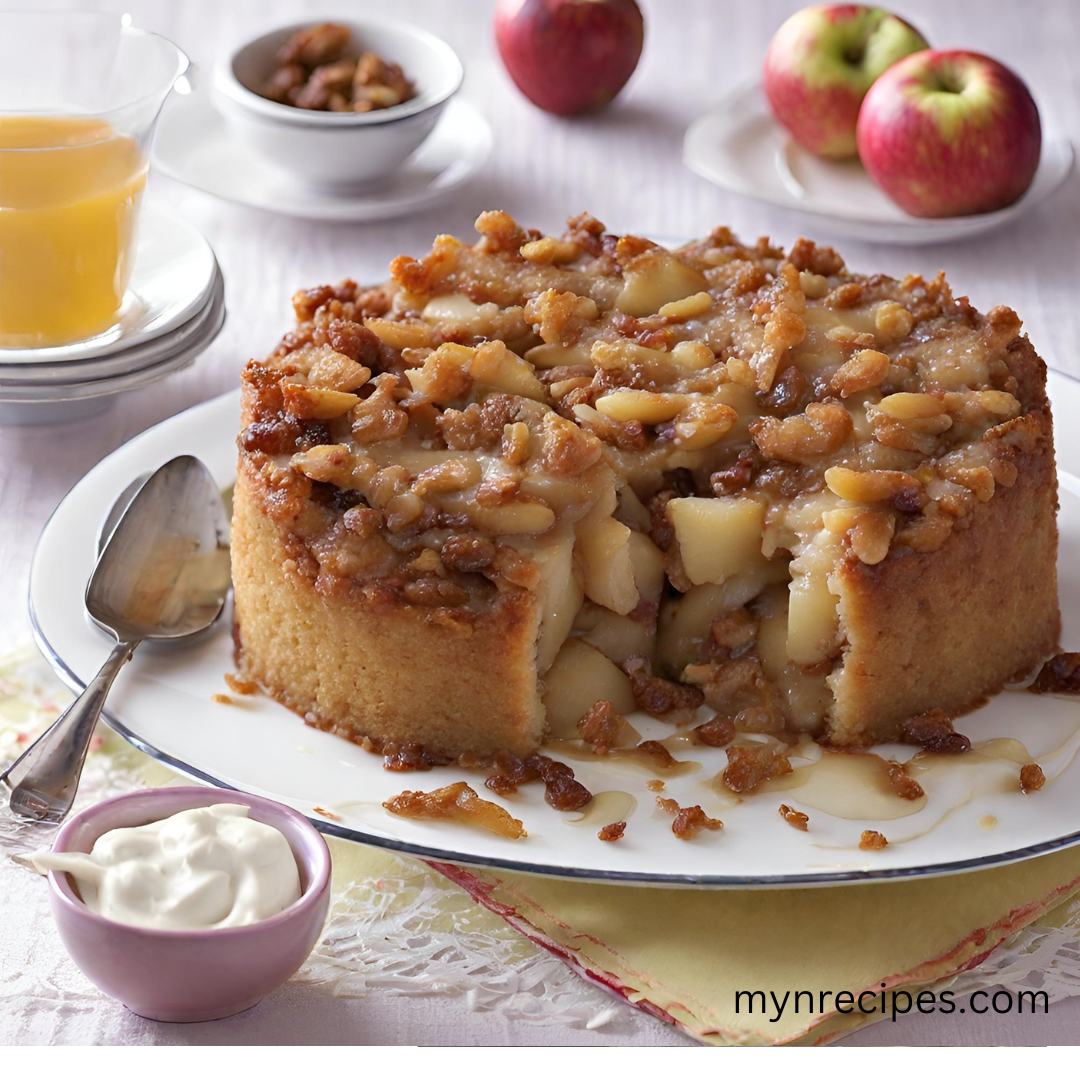
Healthy apple betty

Healthy apple betty This is a recipe for a delicious and healthy apple betty. It's made with apples, sultanas, eggs, sweetener, vanilla extract, yogurt, and cinnamon. It's a great way to use up apples and it's also a low-calorie dessert. About Time: Prep Time: 15 mins Cook Time: 40 mins  Total Time: 55 mins Yield: Serves 6 2½ Syns per serving Ingredients: Two large eating apples, peeled, cored, and sliced Half a cup of sultanas (or raisins) Eight large eggs Four level tablespoons of sweetener granules Two teaspoons of vanilla extract One-third of a cup of fat-free natural yogurt A pinch of cinnamon Fat-free natural fromage frais, to serve Instructions: Apple Betty is a delicious and easy dessert to make. It is made with apples, sultanas, eggs, sweetener, vanilla extract, yogurt, cinnamon and fromage frais. To make Apple Betty, preheat the oven to 190°C/fan 170°C/gas 5. Arrange the apple slices in a 20cm flan dish and sprinkle over most of the sultanas. Beat the eggs with the sweetener and vanilla extract, then add the yogurt and beat again. Pour over the apples and sultanas and allow to sink over the fruit. Scatter over the remaining sultanas, dust with cinnamon and bake for 30 minutes, or until set. Serve warm with the fromage frais. Tips: Use sweetener granules instead of sugar: This will significantly reduce the syns per serving. Choose low-syn yogurt: Opt for fat-free natural yogurt that is labeled as "syn-free" or "free" on your Slimming World plan. Serve with fat-free fromage frais: This will further minimize the syns of your dessert. Use a non-stick flan dish: This will help prevent sticking and make for easier cleanup. Adjust baking time: Slimming World recommends baking for 25-30 minutes, or until the custard sets. Top with a sprinkle of cinnamon: Cinnamon adds a warm and comforting flavor without adding any syns. Enjoy in moderation: Even though this dessert is Slimming World-friendly, it's still important to enjoy it in moderation as part of a balanced diet. mynrecipes.com

Healthy apple betty

This is a recipe for a delicious and healthy apple betty. It’s made with apples, sultanas, eggs, sweetener, vanilla extract, yogurt, and cinnamon. It’s a great way to use up apples and it’s also a low-calorie dessert.

About Time:

  • Prep Time: 15 mins
  • Cook Time: 40 mins 
  • Total Time: 55 mins
  • Yield: Serves 6
  • Slimming World: 2½ Syns per serving

Go to the next page to get the Ingredients

Cream Horns Recipe

Cream Horns Recipe Slimming World Cream Horns, a delightful treat that won't derail your weight loss goals. These light and airy cones are crafted with fluffy quark, a creamy alternative to traditional pastry, and a touch of sweetness from white chocolate Options and granulated sweetener. Top with fresh strawberries or your favorite soft fruits for a burst of flavor . About Time: Prpe Time: 10 mins Cook Time: 10 mins Total Time: 20 mins Yield: 4 Slimming world: 6 Syns per serving Ingredients: 2: Weight Watchers Wraps 1: egg, beaten 2 teaspoons: granulated sweetener 125 grams: quark 2 teaspoons: vanilla extract 11 grams: white chocolate Options, 1 sachet 100 grams: strawberries or other soft fruits Low-calorie cooking spray Instructions: Preheat your oven to 180°C. Spray the cream horn molds generously with low-calorie cooking spray to prevent sticking. Cut the Weight Watchers Wraps in half. Firmly wrap each half around a cream horn mold, ensuring the edges adhere tightly. Brush the wraps with the beaten egg, pressing firmly to strengthen the adhesion of the edges. Sprinkle granulated sweetener over the wrapped cones, such as Sukrin Gold. Arrange the coated cones on a baking tray. Place the baking tray in the preheated oven and bake for approximately 10 minutes or until the wraps turn golden brown and crisp. While the cones are baking, prepare the creamy filling. In a small bowl, whip the quark, vanilla extract, and white chocolate Options sachet until the mixture becomes light and fluffy. Cover the bowl with plastic wrap and refrigerate the creamy filling for at least 30 minutes to firm up. Once the wrap cones have cooled completely, carefully remove them from the cream horn molds. Place a couple of halved strawberries or other soft fruits into the bottom of each cone. Using a piping bag or a spoon, fill the cones with the chilled creamy filling. Garnish the cream-filled cones with additional strawberries or soft fruits to add a burst of freshness and color. Your Slimming World Cream Horns are now ready to be savored! Enjoy this indulgent yet guilt-free treat anytime you're craving a sweet indulgence. Tips: Use high-quality ingredients: The quality of your ingredients will greatly impact the taste and texture of your cream horns. Opt for fresh strawberries, creamy quark, and pure vanilla extract. Wrap the Weight Watchers Wraps tightly: Ensure the wraps are tightly wrapped around the cream horn molds to prevent them from falling apart during baking. Apply firm pressure and brush with beaten egg to reinforce the adhesion. Sprinkle the wraps generously with sweetener: The granulated sweetener, such as Sukrin Gold, will help the wraps caramelize and achieve a golden, crispy exterior. Fill the cones generously: Don't be shy when filling the cones with the creamy quark mixture. The more filling, the more delightful your cream horns will be. Garnish with a variety of fruits: Enhance the visual appeal and flavor of your cream horns by adorning them with a variety of fresh fruits, such as strawberries, blueberries, raspberries, or kiwi slices. Enjoy immediately: For the best taste and texture, savor your Slimming World Cream Horns right away. The crisp cones and creamy filling are meant to be enjoyed together. With these tips, you'll be well on your way to creating irresistible Slimming World Cream Horns that will satisfy your sweet tooth without derailing your weight loss journey.

Cream Horns Recipe

Slimming World Cream Horns, a delightful treat that won’t derail your weight loss goals. These light and airy cones are crafted with fluffy quark, a creamy alternative to traditional pastry, and a touch of sweetness from white chocolate Options and granulated sweetener. Top with fresh strawberries or your favorite soft fruits for a burst of flavor .

About Time:

  • Prpe Time: 10 mins
  • Cook Time: 10 mins
  • Total Time: 20 mins
  • Yield: 4
  • Slimming world: 6 Syns per serving

Ingredients:

  • 2: Weight Watchers Wraps
  • 1: egg, beaten
  • 2 teaspoons: granulated sweetener
  • 125 grams: quark
  • 2 teaspoons: vanilla extract
  • 11 grams: white chocolate Options, 1 sachet
  • 100 grams: strawberries or other soft fruits
  • Low-calorie cooking spray

Instructions:

  1. Preheat your oven to 180°C.
  2. Spray the cream horn molds generously with low-calorie cooking spray to prevent sticking.
  3. Cut the Weight Watchers Wraps in half. Firmly wrap each half around a cream horn mold, ensuring the edges adhere tightly.
  4. Brush the wraps with the beaten egg, pressing firmly to strengthen the adhesion of the edges.
  5. Sprinkle granulated sweetener over the wrapped cones, such as Sukrin Gold.
  6. Arrange the coated cones on a baking tray.
  7. Place the baking tray in the preheated oven and bake for approximately 10 minutes or until the wraps turn golden brown and crisp.
  8. While the cones are baking, prepare the creamy filling. In a small bowl, whip the quark, vanilla extract, and white chocolate Options sachet until the mixture becomes light and fluffy.
  9. Cover the bowl with plastic wrap and refrigerate the creamy filling for at least 30 minutes to firm up.
  10. Once the wrap cones have cooled completely, carefully remove them from the cream horn molds.
  11. Place a couple of halved strawberries or other soft fruits into the bottom of each cone.
  12. Using a piping bag or a spoon, fill the cones with the chilled creamy filling.
  13. Garnish the cream-filled cones with additional strawberries or soft fruits to add a burst of freshness and color.
  14. Your Slimming World Cream Horns are now ready to be savored! Enjoy this indulgent yet guilt-free treat anytime you’re craving a sweet indulgence.

Tips:

  1. Use high-quality ingredients: The quality of your ingredients will greatly impact the taste and texture of your cream horns. Opt for fresh strawberries, creamy quark, and pure vanilla extract.
  2. Wrap the Weight Watchers Wraps tightly: Ensure the wraps are tightly wrapped around the cream horn molds to prevent them from falling apart during baking. Apply firm pressure and brush with beaten egg to reinforce the adhesion.
  3. Sprinkle the wraps generously with sweetener: The granulated sweetener, such as Sukrin Gold, will help the wraps caramelize and achieve a golden, crispy exterior.
  4. Fill the cones generously: Don’t be shy when filling the cones with the creamy quark mixture. The more filling, the more delightful your cream horns will be.
  5. Garnish with a variety of fruits: Enhance the visual appeal and flavor of your cream horns by adorning them with a variety of fresh fruits, such as strawberries, blueberries, raspberries, or kiwi slices.
  6. Enjoy immediately: For the best taste and texture, savor your Slimming World Cream Horns right away. The crisp cones and creamy filling are meant to be enjoyed together.
  7. With these tips, you’ll be well on your way to creating irresistible Slimming World Cream Horns that will satisfy your sweet tooth without derailing your weight loss journey.

Broccoli and Ricotta Cannelloni Recipe

Broccoli and Ricotta Cannelloni Recipe This recipe is a healthy and delicious way to enjoy a classic Italian dish. It is low in syns and can be made with simple ingredients that you probably already have on hand. The recipe is easy to follow and requires minimal cooking time. About Time: Prep Time: 15 mins Cooke Time: 40 mins Total Time: 55 mins Yield: serves 4 3 Syns per serving Ingredients: 4 large broccoli heads (approximately 350g each) Low-calorie cooking spray 1 finely chopped medium onion 2 crushed garlic cloves 600g canned chopped tomatoes with herbs 2 tbsp red wine vinegar 1 level tsp sweetener granules 12 dried lasagne sheets 120g ricotta cheese 130g fat-free natural cottage cheese Finely grated zest of 1 unwaxed lemon 1 medium egg yolk, plus 2 beaten medium eggs 1 level tbsp cornflour 500g fat-free natural Greek yogurt Pinch of grated nutmeg 1½ level tbsp grated fresh Parmesan or vegetarian alternative Instructions: Remove the florets from the broccoli heads, yielding about 1kg. Process the florets in a food processor until they resemble rice-sized pieces. (Utilize the stalks by peeling, cutting into batons, boiling, and serving as a side vegetable.) In a large non-stick frying pan, spray low-calorie cooking spray and heat over high heat. Add broccoli and 2 tbsp water, season lightly, and stir-fry for 5 minutes or until tender. Transfer to a mixing bowl and let it cool. For the tomato sauce, spray a non-stick saucepan with low-calorie cooking spray and place it over low heat. Add onion, garlic, and 2 tbsp water, cover, and cook for 10 minutes until soft. Uncover, add tomatoes, vinegar, and sweetener, and simmer for 15-20 minutes until reduced and thickened. Season to taste and spoon into a large shallow baking dish (approximately 24cm x 30cm). Simultaneously, bring a large saucepan of water to a boil. Cook lasagne sheets one at a time for 10-12 minutes or until just tender. Drain, run under cold water until manageable, then separate the sheets and lay them out on cling film. Cover with another sheet of cling film. Preheat the oven to 200°C/fan 180°C/gas 6. Mix ricotta, cottage cheese, lemon zest, and egg yolk into the cooled broccoli, adding seasoning. Uncover lasagne sheets and distribute the broccoli filling on each one. Roll them up tightly, placing them side by side, seam-side down, on top of the tomato sauce. Mix cornflour with a bit of yogurt to form a paste. Stir in the remaining yogurt, beaten eggs, nutmeg, and seasoning. Spoon over the cannelloni and sprinkle with Parmesan. Bake for 40 minutes or until golden and bubbling. Serve with Speed vegetables. This recipe for broccoli ricotta cannelloni with tomato sauce is a delicious and healthy dish that is perfect for a family meal. Here are a few tips to make it even better: Tips: For a richer flavor, use full-fat ricotta cheese instead of low-fat. You can also add a tablespoon of grated Parmesan cheese to the filling. If you don't have cornstarch, you can use 1 tablespoon of all-purpose flour mixed with 2 tablespoons of water instead. To make the tomato sauce even more flavorful, add a pinch of red pepper flakes. Serve the cannelloni with a side of steamed green beans or broccoli. Here are some additional tips for making this recipe: To make the broccoli rice-sized, simply pulse it in a food processor until it reaches the desired consistency. Be sure to season the broccoli well before stirring it into the filling. Roll the cannelloni tightly and place them seam-side down in the baking dish. Don't overfill the cannelloni, as they will expand during baking. To make the topping, simply whisk together the yogurt, eggs, nutmeg, and seasoning. Sprinkle the Parmesan cheese over the cannelloni before baking. Bake the cannelloni for 40 minutes, or until golden brown and bubbling. Let the cannelloni rest for 5 minutes before serving. Enjoy!

Broccoli and Ricotta Cannelloni Recipe

This recipe is a healthy and delicious way to enjoy a classic Italian dish. It is low in syns and can be made with simple ingredients that you probably already have on hand. The recipe is easy to follow and requires minimal cooking time.

About Time:

  • Prep Time: 15 mins
  • Cooke Time: 40 mins
  • Total Time: 55 mins
  • Yield: serves 4
  • Slimming World: 3 Syns per serving

Ingredients:

  • 4 large broccoli heads (approximately 350g each)
  • Low-calorie cooking spray
  • 1 finely chopped medium onion
  • 2 crushed garlic cloves
  • 600g canned chopped tomatoes with herbs
  • 2 tbsp red wine vinegar
  • 1 level tsp sweetener granules
  • 12 dried lasagne sheets
  • 120g ricotta cheese
  • 130g fat-free natural cottage cheese
  • Finely grated zest of 1 unwaxed lemon
  • 1 medium egg yolk, plus 2 beaten medium eggs
  • 1 level tbsp cornflour
  • 500g fat-free natural Greek yogurt
  • Pinch of grated nutmeg
  • 1½ level tbsp grated fresh Parmesan or vegetarian alternative

Instructions:

  1. Remove the florets from the broccoli heads, yielding about 1kg. Process the florets in a food processor until they
    resemble rice-sized pieces. (Utilize the stalks by peeling, cutting into batons, boiling, and serving as a side vegetable.)
  2. In a large non-stick frying pan, spray low-calorie cooking spray and heat over high heat. Add broccoli and 2 tbsp water,
    season lightly, and stir-fry for 5 minutes or until tender. Transfer to a mixing bowl and let it cool.
  3. For the tomato sauce, spray a non-stick saucepan with low-calorie cooking spray and place it over low heat. Add onion,
    garlic, and 2 tbsp water, cover, and cook for 10 minutes until soft. Uncover, add tomatoes, vinegar, and sweetener, and
    simmer for 15-20 minutes until reduced and thickened. Season to taste and spoon into a large shallow baking dish
    (approximately 24cm x 30cm).
  4. Simultaneously, bring a large saucepan of water to a boil.
  5. Cook lasagne sheets one at a time for 10-12 minutes or until
    just tender. Drain, run under cold water until manageable, then separate the sheets and lay them out on cling film. Cover
    with another sheet of cling film.
  6. Preheat the oven to 200°C/fan 180°C/gas 6.
    Mix ricotta, cottage cheese, lemon zest, and egg yolk into the cooled broccoli, adding seasoning. Uncover lasagne
    sheets and distribute the broccoli filling on each one. Roll them up tightly, placing them side by side, seam-side down,
    on top of the tomato sauce.
  7. Mix cornflour with a bit of yogurt to form a paste. Stir in the remaining yogurt, beaten eggs, nutmeg, and seasoning.
  8. Spoon over the cannelloni and sprinkle with Parmesan. Bake for 40 minutes or until golden and bubbling. Serve with
    Speed vegetables.

This recipe for broccoli ricotta cannelloni with tomato sauce is a delicious and healthy dish that is perfect for a family meal. Here are a few tips to make it even better:

Tips:

  • For a richer flavor, use full-fat ricotta cheese instead of low-fat. You can also add a tablespoon of grated Parmesan cheese to the filling.
  • If you don’t have cornstarch, you can use 1 tablespoon of all-purpose flour mixed with 2 tablespoons of water instead.
  • To make the tomato sauce even more flavorful, add a pinch of red pepper flakes.
  • Serve the cannelloni with a side of steamed green beans or broccoli.

Here are some additional tips for making this recipe:

  • To make the broccoli rice-sized, simply pulse it in a food processor until it reaches the desired consistency.
  • Be sure to season the broccoli well before stirring it into the filling.
  • Roll the cannelloni tightly and place them seam-side down in the baking dish.
  • Don’t overfill the cannelloni, as they will expand during baking.
  • To make the topping, simply whisk together the yogurt, eggs, nutmeg, and seasoning.
  • Sprinkle the Parmesan cheese over the cannelloni before baking.
  • Bake the cannelloni for 40 minutes, or until golden brown and bubbling.
  • Let the cannelloni rest for 5 minutes before serving.
  • Enjoy!

Posh Porcini Risotto Recipe

Posh Porcini Risotto Recipe

Posh porcini risotto Recipe We’ve done away with practically all of the stirring in this baked risotto, taken from our Tray-mendous! cookbook. So you can pop it in the oven and put your feet up without any worries about rice sticking or arms aching. You’re welcome! About Time: Prep Time: 15 mins Cook Time: 1 … Read more

Syn Free Best Ever Bolognese Pasta Bake Recipe

Looking for a hearty and delicious meal that won’t derail your healthy eating goals? Look no further than this Syn Free Best Ever Bolognese Pasta Bake recipe! Packed with flavour and wholesome ingredients, this recipe is the perfect comfort food that won’t sabotage your diet. Made with extra lean beef mince, plenty of veggies, and … Read more

Hey there!

Sign in

Forgot password?
Close
of

Processing files…